Note:
If you are lazy person just like me, who don’t want to follow all the following 21 steps and just wish for a magical github respository of this monorepo then here’s my github repo link: https://github.com/mishivam/react-and-react-native-monorepo-start-code. You can clone it from there.
Steps for monorepo:
1. Open a vs-code in whatever directory you want to open and open the terminal and do following: 
Figure 1: Git init
2. Add a .gitignore file and node_modules in .gitignore file.

Figure 2: Editing gitignore file
3. Now in the terminal do the perform “yarn init” command and make sure you give “true” value to “private” like in following image:

Figure 3: yarn init
4. Now make a new packages folder. It will contain our mobile and web app.

Figure 4: create a new packages folder
5. Open package.json file and add following:

Figure 5: Add workspaces in package.json
6. Now go into packages folder and create a react-web-app like below:
Figure 6: Create web app
wait until its completed!
7. Once web app is created, do the following in the terminal: 
Figure 7: Install packages in root directory
it will install all the packages into root directory.
8. Now let’s install react-native app:

Figure 8: Create react-native app
wait until its completed!
9. Now go into “package.json” file of “nativeApp”. Add following :

Figure 9: Edit package.json of react-native app
This will basically inform yarn that not to install any packages of react-native into root directory. React native can not access files outside of its own directory and if we don’t add “nohoist” yarn will download all react-native dependencies into the root’s node_modules folder.
10. Now we have to go to the root folder and again download all the packages. For that first we need to delete node_modules folder from the root folder. After that go to root folder in the terminal and do the following:

Figure 10: yarn at the root folder after deleting node_modules
wait until its completed!
11. let’s create a common folder in the packages folder which will contain all the common or shared code. After that open terminal in common folder and do following :
Figure 11: yarn init in common folder
Make sure to assign true value to private field.
12. Now open package.json file of the common folder and rename the name field like in the following image:
Figure 12: change name in the common/package.json
I have entered “monorepo” because my project name is “monorepo”.
13. Now add we need to add common folder as dependency in both web app also in the mobile app. Open the package.json file of both projects and add following:

Figure 13: add common as dependency in react-native app

Figure 14: add common as dependency in react web app
14. Now go back to root directory in you terminal and do yarn again.
Figure 15: yarn at the root directory
This will add the common folder into the node_modules of the respective projects.
15. Open “metro.config.js” file of react-native app and add followings: 
Figure 16: metro.config.js
Basically, we are telling metro to get common files from common folder and look for the changes for the same.
16. Now let’s add a file in the common folder. I have named the files as main.js and added one function into that file. Basically that function returns a string. 
Figure 17: common/main.js
17. Let’s import this function in web app as well as mobile app. First I will do for the web app:

Figure 18: app.js of web-app
18. After this changes, open the terminal and go to the web-app directory and perform following commands:

Figure 19: Running the web app
19. Working Web app:
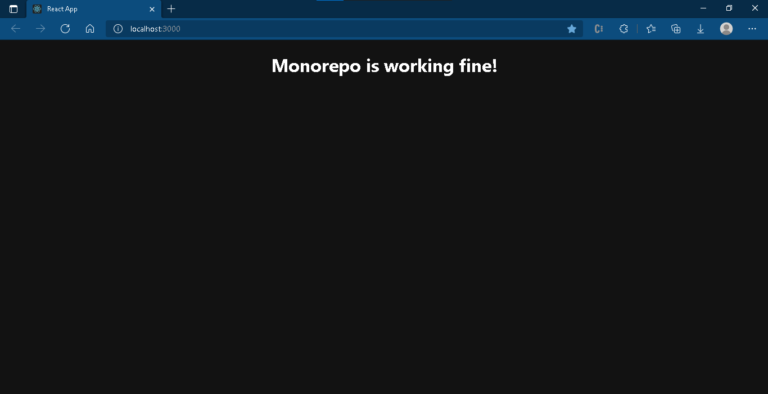
Figure 20: working web app on localhost
20. As you can see in the fig. 20 our web app is working properly. Now let’s do the same for mobile app. Open terminal and go to mobile-app folder . Now open app.js file and change following:
Figure 21: app.js of nativeApp
21. Now in the terminal do “yarn android” or “yarn ios”. This will run the app in their respective platform.
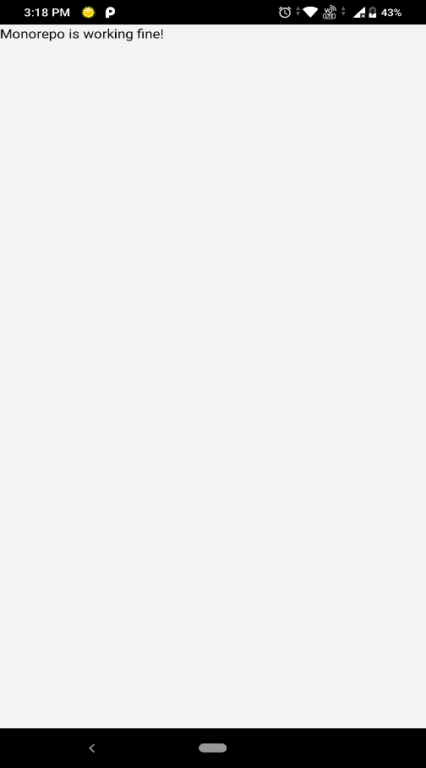
Figure 22:Working Android app
As you can see in fig. 22, our mobile is working fine. You will get the same result in iOS. so here we are done with the monorepo setup.


